Today I finished up the Glaucus knife that I've been working on for the past few weeks. I'm quite proud of the fit and finish on this one. All in all, I call it a success. Here are some pics of the final steps of this build.

If you recall, we left off last week with marking the grind lines on the blade and fastening the blade in my file guide. Here I am hollow grinding the bevels on the blade. I freehand my grinds, but I do like to have my tool rest in place to give my hands a little support.

After grinding in the bevels on the blade, it's time to do some hand sanding. I finish my blades up to 600 grit.

The blade is all finished with a nice 600 grit satin.

I like to put the edge on my blades before I assemble them. There is less of a chance of messing up if I do it this way. I wrap a piece of tape around the ricasso and tang to protect those areas.

The obligatory arm hair shave. It's sharp.

Here is my anodizing setup. It consists of an electrolyte bath (water and borax), a DC power source, and a pair of leads. The negative lead gets attached to an old piece of O1 steel, which is actually a failed liner from my first folding knife ever, and placed in the bath. The positive lead gets attached to the liner that will be anodized.

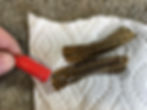
And here are the liners after being anozided a deep bronze color. Nice!

Here is my setup for putting my maker's mark on the blade. I use a power source that I build from online plans. With my maker's mark stencil taped to the blade, I use my setup to etch the mark into the blade.

Here I am etching the mark on the blade. I use a piece of folded up paper towel for my etching pad. I've found it works as well as the commercially available pads but cost much less.

The finished blade. Looking good.

For a finishing touch, I like to carbidize the face of my lock bar. I use my etching unit for the power supply and a Dremel vibratory engraver that I have wired up and an old carbide cutter installed. Twenty seconds later and the lock face has a layer of carbide deposited on it that will keep the lock from sticking.

The last part I need to build is the thumb stud. I chuck up a small rod of 416 into my lathe.

After drilling a blind hole into the bottom of the stud, I thread it for a 0-80 screw.

The shaped and finished thumb stud. It's a little out of focus, but it's a tiny part.


And here are a couple pics of the finished knife. Looks pretty darn good to me. It should make for a nice and durable EDC knife. This knife will be entered into a knife swap drawing that several knife makers are holding right before Christmas. I hope that it's winner is happy with it.
Thanks a bunch for sticking with me on this build. The next build will be something extra special that I've been looking forward to getting a start on. I'm going to build two Pride design knives with some special materials and details. I hope you'll check back soon as I start the next adventure into knife making.
- Brandant Robinson
